Fieldwork - 8 Fun Tips to Being a Rockhound - Part 1
Rockhounding is Fun
Everyone can enjoy Rockhounding. Since rocks and minerals are everywhere, you don't need a lot of equipment to begin a search. A trip to the beach or a hike can be the beginning of a Rockhounding adventure.
Before you begin your adventure you can find an easy to read book in the library or bookstore so that you will know what you are looking for. As you learn about rocks and minerals, even your friends might become interested and you will have stories to tell one another. You will develop a curiosity about how these minerals and crystals are formed and that might lead to a career in lapidary (the cutting and polishing of stones), jewelry making, or becoming a geologist.
Once you've developed a collection and catalogued and labeled your specimens, you will be able to speak knowledgeably about them. Then you can display them and impress your friends, as well as go on collection expeditions and trade samples with others.

1. Knowing what supplies to take
If you're planning on going on a 3 day camping trip to a remote area you may need to take a number of important supplies along with you on the journey. However for an afternoon close to home or the cabin you may not need as much equipment.
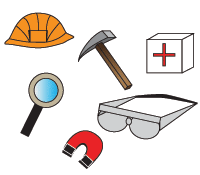
Here are some items you can take along with your backpack to help you get started:
- Hammer - this is known as a geologist's pick or mason's hammer. (Not a claw hammer which could chip on rocks) You can find one in a hardware store or Rock Shop
- Chisels - 1/2 inch and 1 inch size
- Gold Panner's Pan - in case you come by a stream and want to pan for minerals. A light plastic one can be picked up at most hardware stores and Rock Shops.
- Magnet - to remove iron flecks from your samples
- Day Pack - to carry tools, specimens and lunch
- Plastic Bags and/or small Jars - to hold samples
- Newspaper - to wrap large, sharp or delicate samples, never use cotton because its fibers can become entangled in the crystals.
- Safety Glasses - the goggle type are best, but some wrap-around plastic sun glasses can work just as well.
- Notebook, Pencil, and Marking Pen
- Appropriate Clothing - rain gear, sturdy hiking shoes or boots, appropriate pants to protect knees, sunscreen and hat
Some other important items you may want to consider taking for longer off-road trips are:
- Hand Lens - a magnifying glass for looking closer at details
- Gloves - for handling rocks with sharp edges
- Hardhat - if you plan to work near a quarry, a steep cliff or embankment or enter a cave.
- Extra Tools - Sledgehammer, wedges, screwdriver, gardening tools, pry bar, rake and screen, pointed shovel, compass, flashlight
- Extra Maps - in case one gets lost and you need to review the geography and topography of the area
- Altimeter or Global Positioning System - in case you get lost or need to find the correct position using you map
- Survival Kit - in case you are going on a longer extended hike, this might include your first aid kit
- Resource Guides - this includes geological guide books, maps, and mineral and rock identification kit

2. Knowing Where to look
In British Columbia the landscape is very diverse. This is because over time many forces have come to shape our province. They include floods, the ice age, volcanic uprising and the shifting of the continental plates through earthquakes. Through these processes much of British Columbia is a rugged landscape unlike Alberta to the east which is mostly flat prairie lands. Because of these shaping forces and diversity of rock, the mineral content in British Columbia is quite immense. Also due to the ruggedness much of British Columbia has not been adequately mapped or prospected. So there are still many possible treasures in our province waiting to be discovered.
Rocks, Crystals and Minerals can be discovered in a variety of locations:
- Anywhere rocks are exposed, such as steep hill sides, cliffs, gullies, quarries, or where road work and construction is taking place
- Beaches, around riverbeds, lakes, and streams from glacial deposits
- Caves or excavations from old mine dumps
- In the desert in dry lake beds
- Or possibly in your own backyard, depending on where you live
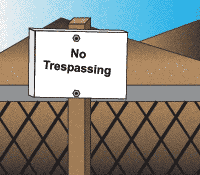
However if you are collecting on private land always ask the owner's permission. If planning to dig in a public area check to see if you need a permit. Try to disturb the environment as little as possible and fill in your holes. Always close gates so that animals and livestock don't get loose. And most importantly if the sign says "Do Not Trespass!", then don't. (Back to top)

3. Taking your Treasures Home
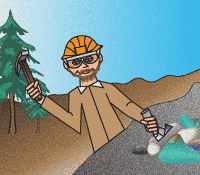
Once you've collected a number of samples after a hard days work it's great to take them home. The easiest samples are the ones that are already loose from the rock. Looking around an area first for these pieces can often save you a lot of time instead of using your pickaxe or hammer.
However, sometimes the good samples will have to be dug out of the rock. If the sample will not come out cleanly, try taking some of the rock surrounding the sample as well. This will help you and others better study the environment the mineral came from and if required you can always clean this area off when you get home.
When chiseling or wedging out a sample, look for weaknesses surrounding the mineral or crystal. Cracks and softer soil surrounding the mineral are good places to work. To avoid damage and fracture always remember to work carefully around a specimen that you may want to display later on. (Back to top)

4. Knowing What you've Found
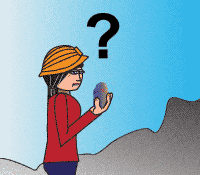
Once home you can begin to inspect your many treasures. Different minerals have different properties to identify them. (See Know your Crystal Shapes for more information). Often when digging you may find a mineral or crystal, but be unsure as to what it could be. In these cases it's best to wait until you get home and in a relaxing environment. The more samples you collect the better you will become at identifying them.
Some properties to look at are:
- Colour
- Streak
- Form
- Cleavage
- Luster
- Density
- Hardness
- How the sample acts with magnets and acid
If you’re still unsure about what your mineral is there are many books available as well as resources on the internet to help you understand these properties. (See Resources)
When you are at home here are a few items to help you identify your crystal:
- Hand lens - 10 or 15 power with a wide field of view
- Penknife - for digging out dirt or scratching to determine hardness
- Streak Plate - on a white no-glossy ceramic tile a rock or mineral will sometimes leave a different streak than its colour; this can be useful in identification
- Dilute (5%) Muriatic Acid(HCI) - This should only be handled by an adult and always kept in a leak proof plastic container with an eye dropper. If it gets in contact with clothing the clothes will begin to rot. Acid eats away at some rocks and minerals
- Guide Book - A good Rock and Mineral Identification book, listing the minerals you are likely to find in your area.
- Magnet
(Back to top) or Learn the next four tips Here
